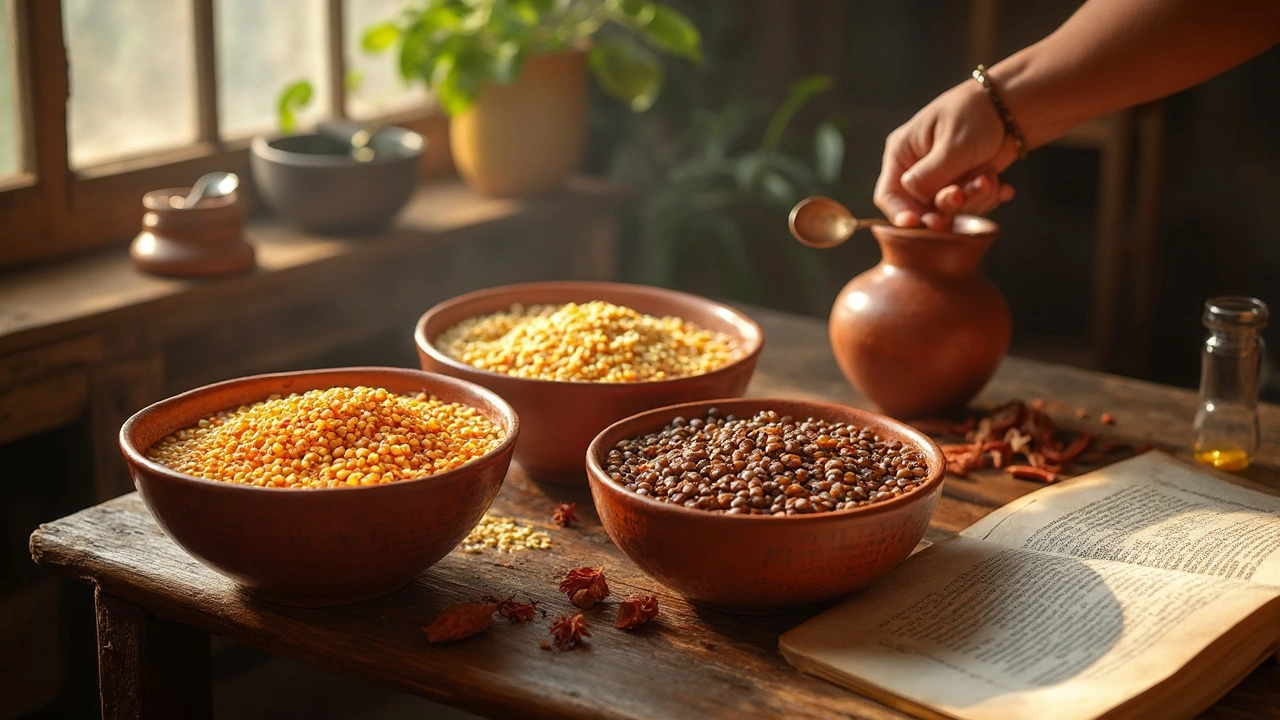
Ever wonder why your grandma insisted on soaking dal overnight? Turns out, she was onto something. Soaking dal not only makes it cook faster but also enhances the taste and texture. It's like letting the lentils prep themselves before they hit the pot. Pretty neat, right?
Now, let's not treat all types of dal the same. From chana to urad to toor, each has its own soaking personality. Chana dal loves a good overnight soak, while toor dal is a bit more laid-back, requiring just a couple of hours. Knowing these little quirks can save you from a dal disaster.
No time to soak? No worries. Quick soaking techniques are here to save the day. A short hot water bath might just do the trick when you're in a pinch. And let's not forget about those nutrients we're trying to keep alive. Soaking helps retain them too, making your meal both tasty and healthy.
- Why Soak Dal?
- Different Types of Dal and Their Soaking Times
- Quick Soaking Methods
- Troubleshooting Common Soaking Issues
- Tips to Enhance Your Dal
- Nutritional Benefits of Proper Dal Preparation
Why Soak Dal?
Soaking dal might seem old-fashioned, but it’s a culinary hack you don't want to miss. The main reason to do it? It simply makes cooking easier and more efficient. When you soak dal, it absorbs water, which speeds up the cooking process. No one wants to be stuck waiting for hours for their dish to be ready, right?
Reduces Cooking Time
By soaking, you could cut the cooking time by almost half. Less time on the stove means less energy spent, which is better for both the environment and your utility bills. Use a simple rule of thumb – the longer you soak, the faster it cooks.
Boosts Digestibility
The process doesn't just stop with quicker cooking. Soaking actually breaks down complex sugars and proteins in the dal. This makes it more digestible, helping you avoid that uncomfortable bloated feeling after your meal. Who wants to feel sleepy right after eating anyways?
Retains Nutrients
While cooking faster, the nutrients in your dal are preserved. Let’s not forget they are a plant-based powerhouse, rich in proteins, fiber, and essential nutrients. So, give it a good soak, keep those nutrients intact, and enjoy a more nutritious meal.
Enriches Flavors
Lastly, soaking gives dal a chance to absorb any spices or salt you add to the water. Talk about enhanced flavor right from the start. Many chefs add a bit of turmeric or salt, giving the lentils a head start in flavor-building.
| Type of Dal | Recommended Soaking Time |
|---|---|
| Chana Dal | 8 hours |
| Urad Dal | 6 hours |
| Toor Dal | 2 hours |
Different Types of Dal and Their Soaking Times
Alright, let's dig into the nitty-gritty of soaking dal. Just like people have different morning routines, each type of dal has its own soaking preference. Knowing these can save you time and effort in the kitchen.
Chana Dal
Chana dal, the split chickpea, is a hearty choice. It's pretty dense and ideally should soak for around 6 to 8 hours, or overnight if you've got the time. This prolonged soak helps it soften, reducing its cooking time significantly.
Toor Dal
Toor dal, also known as pigeon peas, is a bit more forgiving. A 1 to 2-hour soak is usually enough. However, if you're planning to use it in a pressure cooker, you might get away with a quick rinse and skip the soak—but where's the fun in that?
Urad Dal
Urad dal, the star of dals when it comes to creamy dishes, also likes a good soak. Let it sit in water for about 4 to 6 hours. This helps it cook evenly, ensuring the perfect texture for dishes like dal makhani.
Moong Dal
Moong dal is the least demanding of the lot. A brief 30 minutes to 1-hour soak does the trick here. Its small size means it surrenders to water rather quickly.
| Dal Type | Recommended Soaking Time |
|---|---|
| Chana Dal | 6-8 hours |
| Toor Dal | 1-2 hours |
| Urad Dal | 4-6 hours |
| Moong Dal | 30 mins-1 hour |
Being familiar with these soaking times can make a world of difference, especially when you're in a rush. Plus, the little bit of planning pays off with flavors and textures that are right on point. Next time you're throwing a dal dish together, you'll know exactly how much prep time you need.
Quick Soaking Methods
In today's busy world, who has the time to soak dal for hours? Thankfully, there are handy quick soaking hacks that can save your day.
Boiling Water Method
This method is like giving your dal a shortcut spa treatment. First, rinse the dal thoroughly. Then, place it in a pot and pour boiling water over it until covered. Let it sit for about 30 minutes. It's a warm-up lap before the cooking marathon, and it works like magic for types like toor dal or moong dal.
Microwave Hack
If you're really in a rush, microwaving is your best friend. Rinse the dal as usual, put it in a microwave-safe bowl, and add water. Make sure the water is an inch above the dal level. Microwave on high for 10 minutes, then let the dal soak in the hot water for another 15-20 minutes. This trick is perfect for days when you're craving a quick and easy dal recipe.
The Pressure Cooker Trick
This one's a little sneaky. After rinsing, you can skip soaking entirely with certain dals like chana by adding a pinch of baking soda and cooking them directly in a pressure cooker. It cuts the cooking time significantly but requires precision—don't go overboard with the soda.
Below's a comparison of how each quick method fares:
| Method | Soaking Time | Best For |
|---|---|---|
| Boiling Water | 30 minutes | Toor, Moong |
| Microwave | 20-30 minutes | Lentils in a hurry |
| Pressure Cooker | As you cook | Chana |
Remember, while these methods are excellent for a time crunch, soaking dal the traditional way when you have the chance can be more beneficial for flavor and nutrient retention. But hey, life doesn't always go as planned, right? So, it's good to know you've got options.
Troubleshooting Common Soaking Issues
Finding yourself puzzled by soaking dal? Don't sweat it! Even seasoned cooks face hiccups now and then. Knowing how to troubleshoot issues can save your meal from mishaps.
Dal Not Soft Enough?
So you've soaked your dal, but it's still too hard. Common culprit? Not enough soaking time. Remember, different types of dal need their own soaking routines. If you didn't hit the right timing, try extending the soak a bit next time. For emergencies, a quick pressure cooker session can work wonders.
Sour Smell After Soaking?
Ew, that sour smell is not what you signed up for. It's usually a sign that the dal has overstayed its welcome in water or the water temperature was too warm. Change the soaking water after a few hours, especially when soaking overnight. Fresh water will help keep things crisp and clean.
Discolored Dal?
Discoloration happens if the dal is exposed to air or light for too long. The fix? Use an airtight container or cover the dish completely, minimizing air exposure. Keep it somewhere cool and darker if possible.
Foamy Water?
Foam isn't as scary as it looks. It's just starch released from the dal. Rinse it out, and you're good to go. If it bothers you, rinse the dal before soaking to clear out extra starch upfront.
Dal Cooked Unevenly?
This one's a pain, but the trick is in even soaking. Stir occasionally to make sure water reaches every grain. Fancy a pro tip? Sort through the dal before soaking, getting rid of any irregular bits.
Getting your dal cooking just right can seem like a mystery, but bit by bit, you'll catch on. These fixes come from years of dal preparation across many kitchens, and they'll steer you toward better results every time. Try adjusting these little factors and watch your lentils shine in the spotlight!
Tips to Enhance Your Dal
Dal is a staple, sure, but who says it can’t be exciting? A few tweaks here and there can make your dal recipes the star of your meals. Let's dive into some simple yet effective tips to lift your dal game.
1. The Mighty Tempering
Tempering, or 'tadka,' is where the magic happens. It’s that sizzling mix of spices in hot oil that you add on top of your cooked dal. Try heating a bit of ghee or oil, toss in cumin seeds, mustard seeds, and a pinch of asafoetida. Top it off with some red chili powder for an extra punch.
2. Fresh Ingredients Matter
Using fresh ingredients like ginger, garlic, and tomatoes can make a world of difference. Toss them in after the dal is cooked and give it a good mix. Not only will it enhance the flavor, but it also keeps all those nutrients intact.
“Well-tempered dal with fresh ingredients can transform a meal,” says Chef Anjali Pathak, an expert in Indian cooking.
3. Spices that Sing
Don't be shy with spices. Turmeric, coriander, and garam masala are your friends. Add them at different stages of cooking to see what works best for your taste buds.
4. Acidity for Balance
A touch of acidity, like lemon juice or tamarind paste, added towards the end of cooking, can brighten up the flavors in your dal.
5. Experiment with Consistency
Like your dal soupy or thick? Learn to play with the water ratio. More water for a broth-like dal and less for a creamy texture. It's all about finding your sweet spot.
6. The Power of Greens
Add some leafy greens like spinach or kale just before turning off the heat. This not only boosts the nutritional value but adds an earthy flavor that complements most dals.
7. The Right Amount of Salt
Getting salt right can be tricky. Tip: add it towards the end. This helps control the flavor better, especially if the dal thickens as it cools.
Explore these tips, and you’ll transform your dal into something that’s not just a sidekick but the main event. Enjoy experimenting and see how these small changes create a big WOW at your dinner table.
Nutritional Benefits of Proper Dal Preparation
When it comes to dal cooking tips, proper preparation can make a huge difference in the nutritional value you get from your meal. Dals, or lentils, are already a great source of protein, especially for vegetarians. Correct preparation methods can further retain these essential nutrients, making the most of your efforts in the kitchen.
Enhanced Digestibility
Soaking dal helps break down complex sugars responsible for bloating and gas. This is crucial for improving digestibility, ensuring your body appreciates what it's been given without any funny tummy issues. Not only does it help your gut—but it also means fewer surprises later!
Maximizing Nutrient Availability
What happens when you soak dal? The process reduces anti-nutrients like phytic acid, which can block your body's absorption of crucial minerals like zinc and iron. So, in a way, soaking is like offering a nutritional unlock code to your lentils.
Boosting Protein and Fiber
Soaking can improve the protein quality and fiber content that dals naturally offer. Since these are plant-based proteins, they’re lighter on your system compared to meats and are packed with fiber that supports your digestive health. Who doesn't want a better-functioning digestion system?
Sustained Energy Release
If you're looking to maintain that energy throughout the day, dal can be a game-changer. Proper soaking increases their complex carbohydrate breakdown, which translates into a steady energy release—ideal for tackling that mid-afternoon slump without reaching for a sugary snack.
Retained Vitamins and Minerals
With proper dal preparation, you keep more B-vitamins intact. These vitamins are superstars when it comes to energy production and skin health. So more than just filling your tummy, it's about giving your whole body a nutrient-boosting hug.
In essence, giving your dal a nice soak before cooking isn't just about tradition. It's about optimizing the nutritional balance you provide to your body, and preparing lentils in this way is a small step towards better health. So the next time you reach for those lentil bags, give them a good bath first!
